
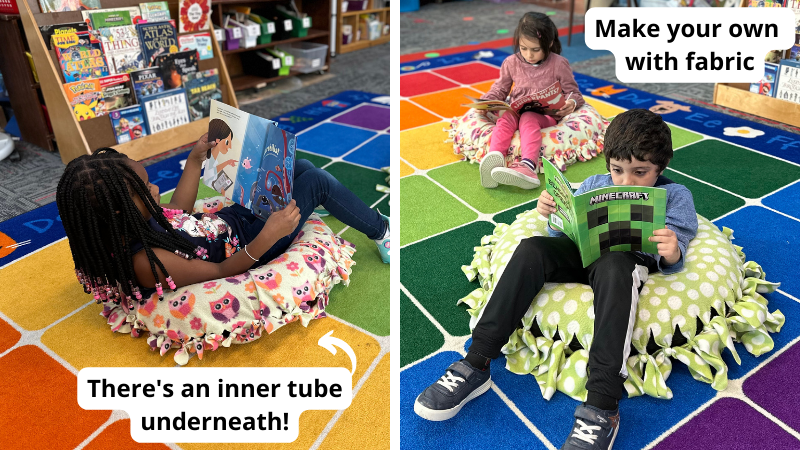
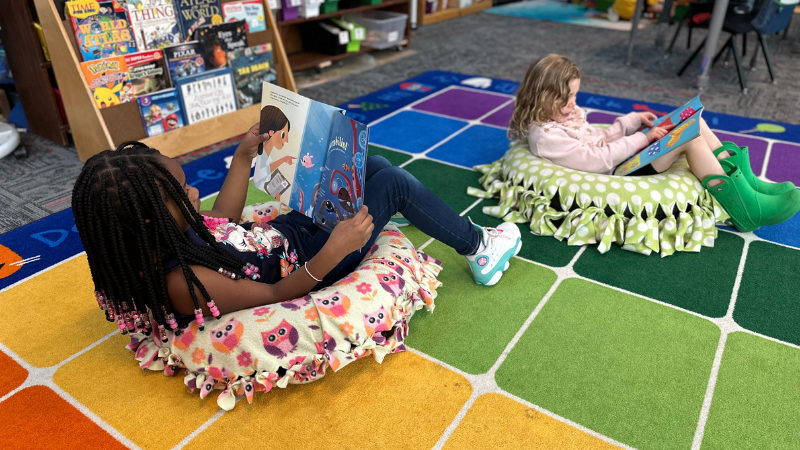
These internal tube studying chairs have been going sturdy for greater than 4 years on this kindergarten classroom. The youngsters wish to name them their studying donuts. We made them by utilizing the identical cut-and-tie technique you utilize for these no-sew fleece tie blankets. All it’s important to do is select the material—perhaps to match your classroom theme or college colours—then simply reduce, tie, and go.
We first made these greater than 4 years in the past, and so they’re nonetheless holding up, even with children leaping and bouncing round on them. The kindergarten instructor who has them in his room says they’re a classroom favourite throughout studying time. The important thing to creating them final is to begin with a heavy-duty internal tube, like this one on Amazon. You too can choose up an internal tube within the tire part of your native retailer.
What You Want
Only a heads up, WeAreTeachers could accumulate a share of gross sales from the hyperlinks on this web page. We solely suggest gadgets our staff loves!
Step 1: Inflate your tube and measure your material.
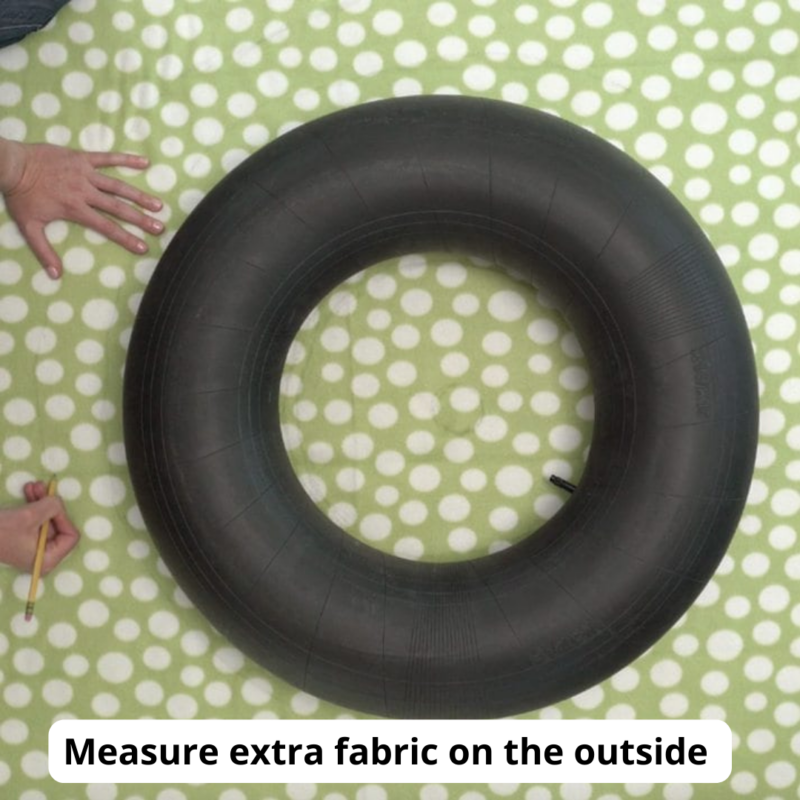
Keep in mind the secret’s to get a THICK tube—the summer season pool ones in all probability received’t maintain up for lengthy. We suggest a tube round 24 to 36 inches in measurement. Then inflate it. The quantity of fabric you want will rely upon the scale of your tube, however on the whole, we suggest about 2 or 3 yards. Then layer your material with the boring sides as much as offer you a high and backside. Utilizing a pencil, evenly hint the within and outdoors of your tube. Then, 5 to 7 inches from the skin tracing of the tube, hint one other circle.
Step 2: Create your sample.
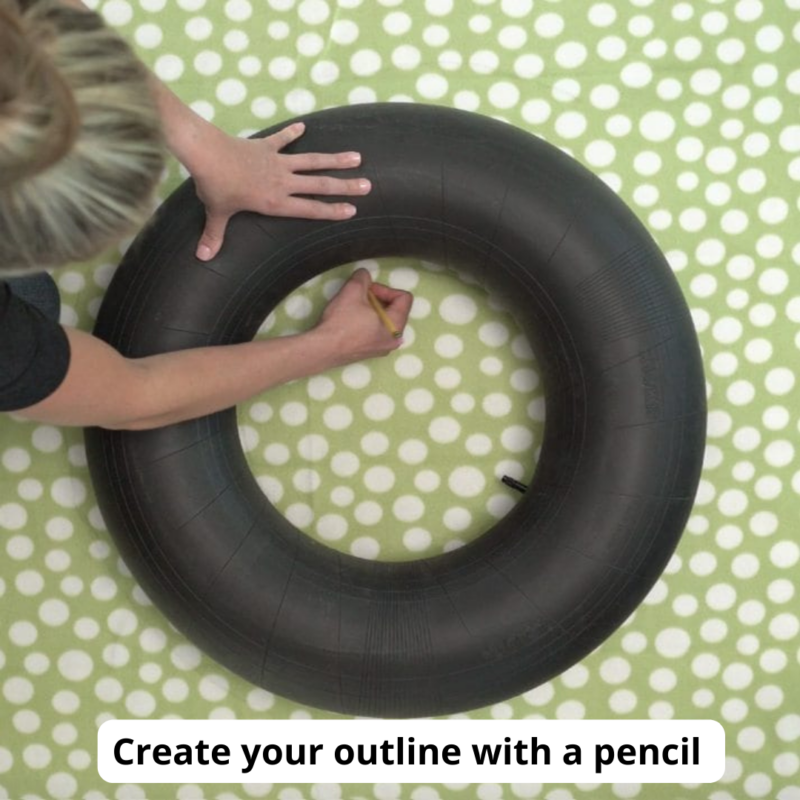
Frivolously hint strips onto the within of your circle after which the skin, the place you added 5 to 7 inches. Needless to say you wish to hint a small circle on the within space earlier than you hint the strips. Don’t fear about it being good. Crucial factor to recollect is that you simply don’t need your strips too skinny.
Step 3: Reduce your strips.
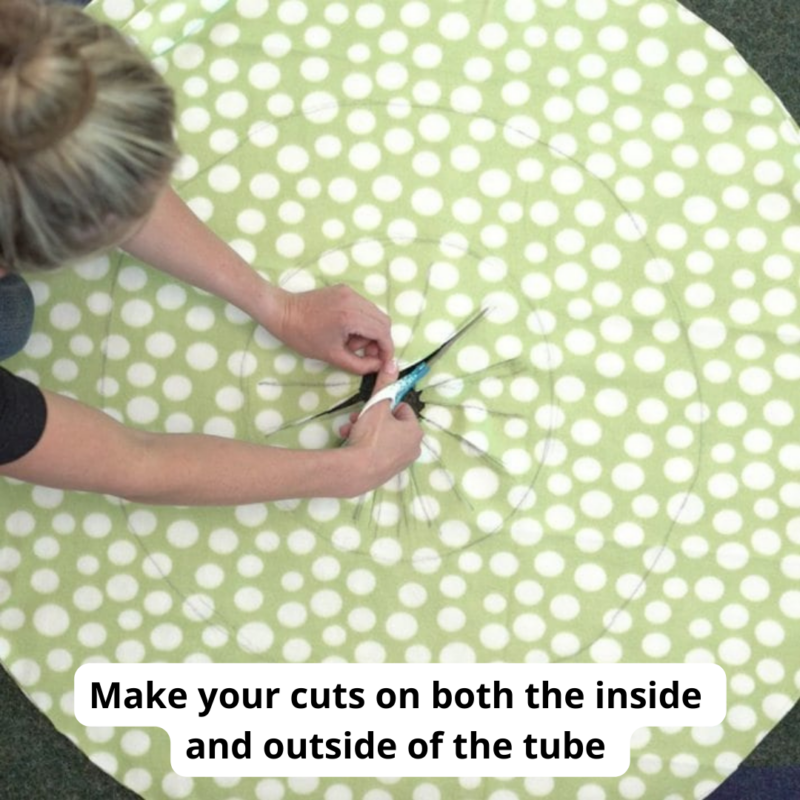
You’re prepared to chop. First, reduce out that small circle on the within of your tube. Then reduce your strips. You wish to reduce the strips about three-quarters of the way in which to the outlined edge you made earlier. You possibly can all the time reduce extra if you should. Repeat on the skin, additionally slicing about three-quarters of the way in which.
Step 4: Separate and layer.

Now that you’ve got your strips, pull aside your two material layers and place one on high of the internal tube. Attempt to line up the material as finest as doable, having the highest and backside match. For those who’d like so as to add further protection to your tube, you’ll be able to connect a strip of scrap fleece materials to the within of your tube. This may preserve the internal tube from displaying by in spots.
Step 5: Tie all of it up.
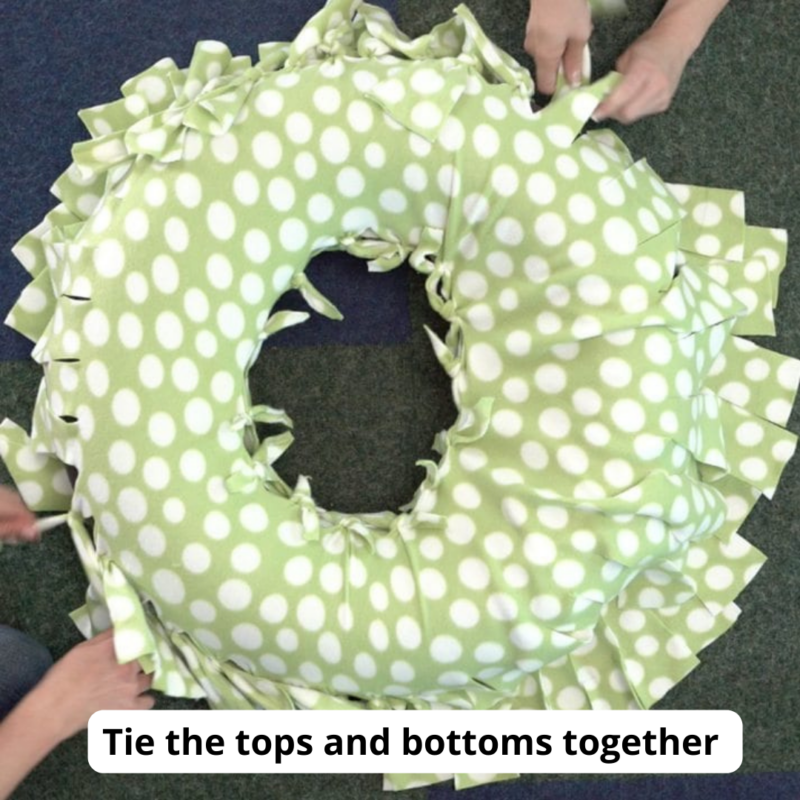
Tie all the things collectively! That is the enjoyable half, and you’ll positively solicit assist from a pal or your college students. Make sure to tie across the air valve. That method in case your tube will get barely deflated, you’ll be able to simply add extra air.
Watch our video for more information on making these DIY internal tube chairs.
What artistic issues have you ever made in your classroom? Come share in our WeAreTeachers HELPLINE group on Fb.
Plus, try methods to make a pool noodle studying chair!